

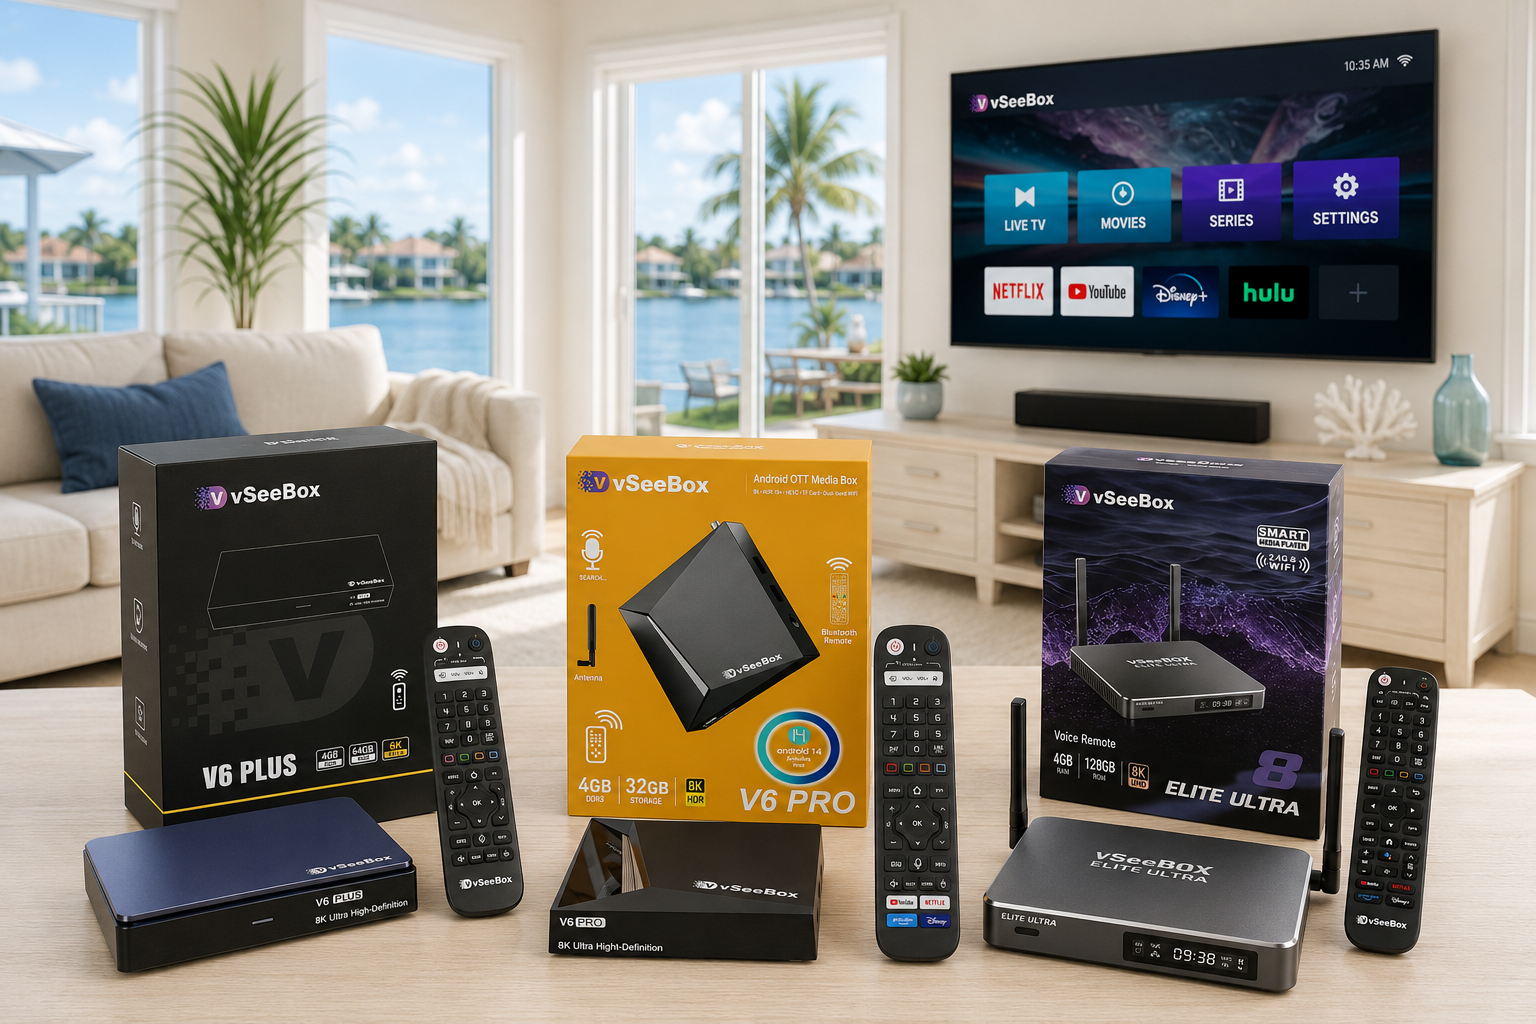
Easy Installation
What's in the Box
vSeeBox Unit – The main hardware device.
Power Adapter – For powering the device.
HDMI Cable – For connecting the vSeeBox to your TV.
Bluetooth Remote Control – Used to navigate and control your vSeeBox.
Quick Start Guide – Instructions for initial setup and configuration.
Warranty Information – Details about the product warranty and support.
How to Set Up vSeeBox: Complete Installation Guide
Setting up your vSeeBox device is a simple process that can be completed in just a few steps. This guide will walk you through the initial installation, remote pairing, display settings, network configuration, and basic troubleshooting.
Whether you are installing your device for the first time or connecting it to a new TV, following this guide will help you complete the setup process smoothly.
What You Need Before Setup
Before starting the installation, prepare the following items:
vSeeBox device
Power adapter
HDMI cable
WiFi antenna (if included with your model)
Bluetooth remote control
Two AAA batteries
Ethernet cable (optional)
Make sure your TV or monitor has an available HDMI port before connecting your device.
Connect Your vSeeBox to Your TV
Follow these steps to connect your device:
Connect the power adapter to your vSeeBox.
Connect your vSeeBox to the TV or monitor using the HDMI cable.
If your display supports AV connection, use the appropriate AV cable.
Attach the WiFi antenna to the device if required.
Insert two AAA batteries into the Bluetooth remote control.
For users who prefer a wired connection, connect an Ethernet cable between your vSeeBox and your router.
Complete the Initial Setup Process
After connecting the hardware, turn on your TV and select the correct HDMI input.
The initial setup guide will help you configure your device settings step by step.
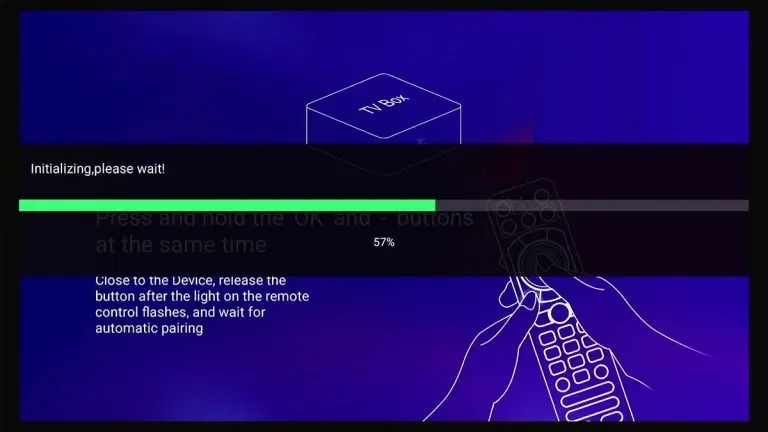
Pair the Bluetooth Remote Control
Before continuing, connect the remote control to your vSeeBox.
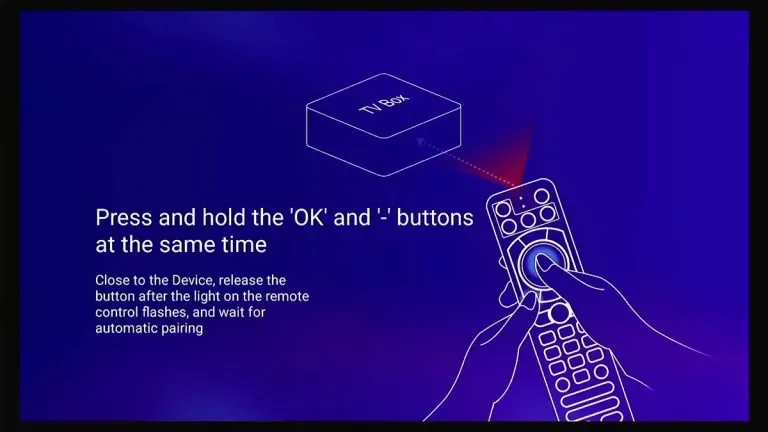
Follow these steps:
Press and hold the OK button and VOL- button on the remote at the same time.
Wait until the indicator light starts flashing.
The device will confirm when the remote connection is completed.
Continue to the next setup step.
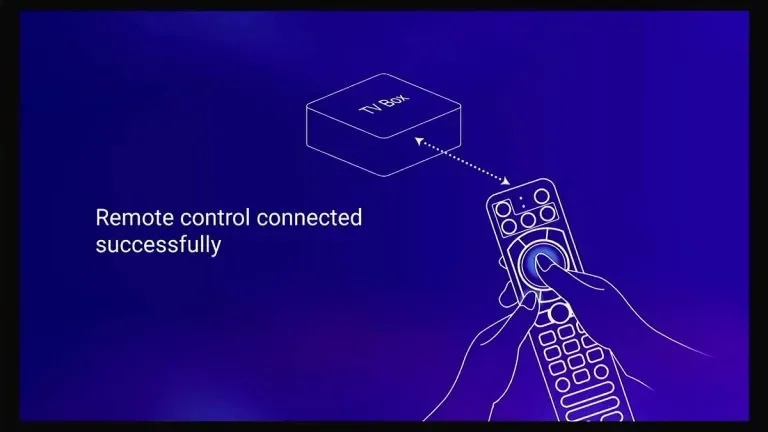
If the remote is already connected, you can continue with the setup process.
Select Language and Display Settings
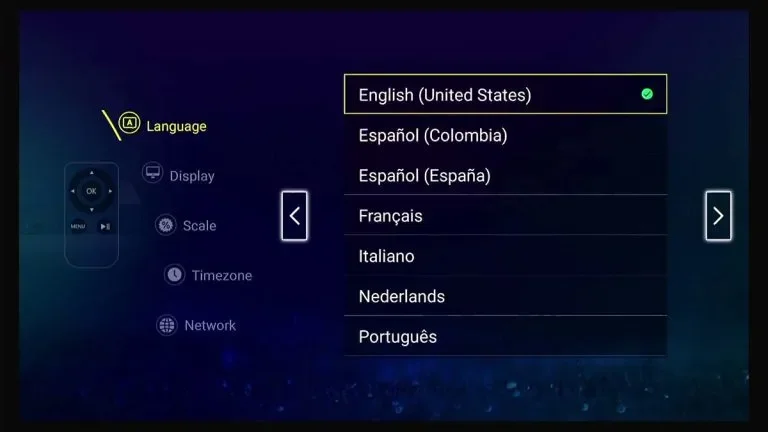
Choose your preferred language during the initial setup.
After selecting the language:
Press the right arrow button to continue.
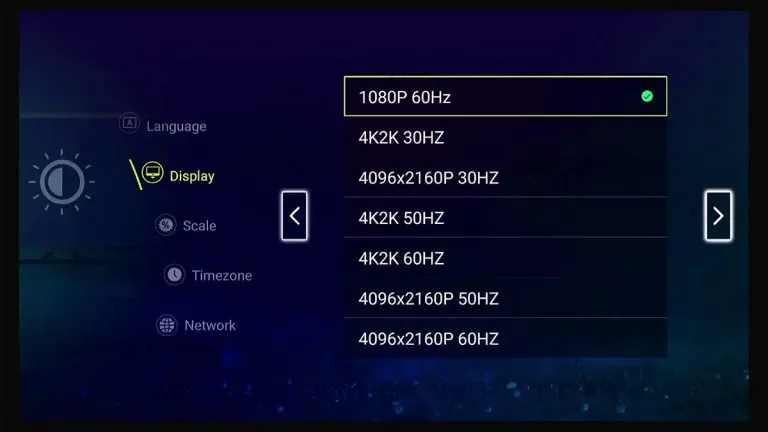
Select your display settings.
Confirm your settings and move to the next step.
For refresh rate settings, selecting an appropriate option based on your TV specifications can help provide smoother image performance.
Adjust Screen Display Settings
Select the screen ratio according to your TV or monitor.
Correct screen adjustment helps ensure that images display properly without unnecessary cropping or distortion.
After completing the adjustment, continue to the next setup step.
Set Your Time Zone
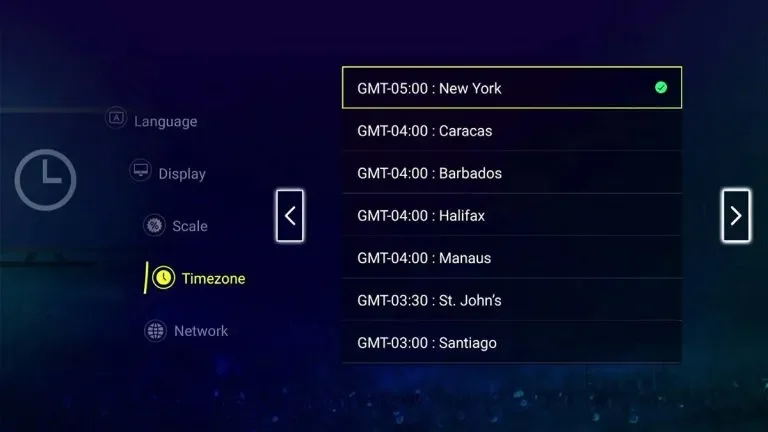
Select your local time zone from the available options.
Choosing the correct time zone helps ensure that your device displays accurate time information.
Connect vSeeBox to the Internet
vSeeBox supports both WiFi and Ethernet network connections.
Choose the connection method that matches your home network setup.
Set Up Ethernet Connection
To connect using Ethernet:
Connect an Ethernet cable from your vSeeBox to your router.
Open the network settings menu.
Confirm that the Ethernet connection is detected.
Continue with the setup process.
A wired connection can provide a stable network environment for your device.
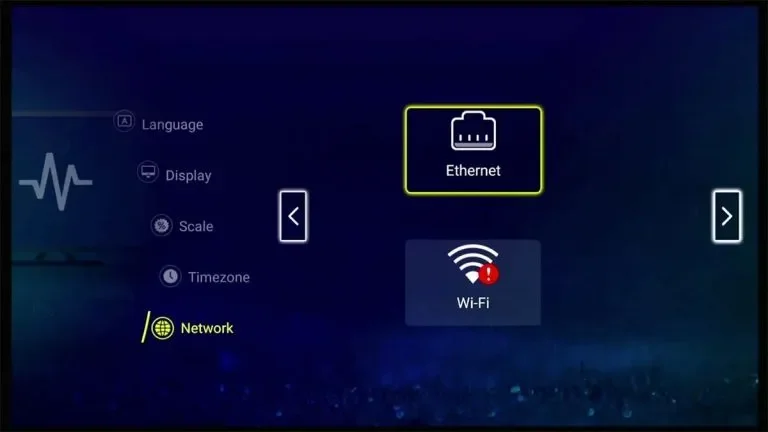
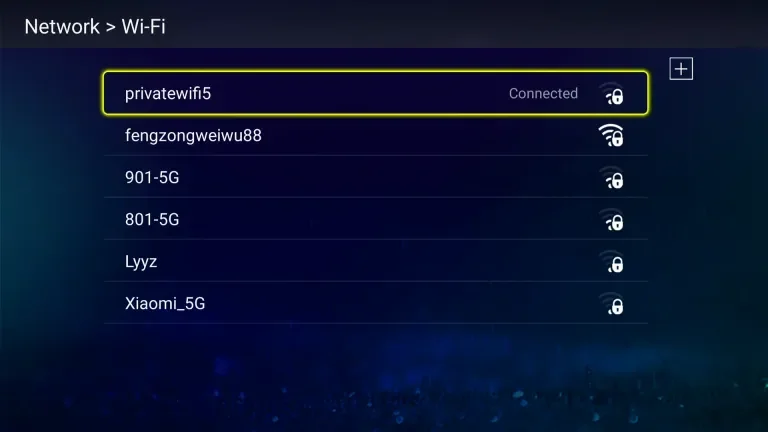
Set Up WiFi Connection
To connect your vSeeBox through WiFi:
Open the network settings.
Select the WiFi option.
Choose your wireless network.
Enter your WiFi password.
Wait for the connection status to update.
If the network status shows Connected, the WiFi setup is complete.
If the status shows Remembered, the saved password may be incorrect.
To reconnect:
Select the network.
Choose Forget Network.
Enter the correct password again.
Connect to the WiFi network.
After successful connection, continue the setup process.
Complete the Setup
After finishing the network configuration:
Review your selected settings.
Confirm the setup options.
Complete the initial configuration.
Your vSeeBox is now ready for everyday use.
How to Use Voice Control on vSeeBox
Some vSeeBox models include a Bluetooth voice remote that provides convenient navigation and control.
Before using voice control, make sure your remote is properly connected.
Check Remote Connection Status
To confirm the Bluetooth remote connection:
Open the device settings.
Enter the system settings menu.
Open Bluetooth settings.
Check the connected device list.
If the remote appears as connected, the voice control feature is ready to use.
Pair the Remote for Voice Control
If your remote is not connected:
Press the voice button on the remote.
Follow the pairing instructions displayed on the screen.
Press and hold the OK button and VOL- button together.
Wait for the indicator light to flash.
Complete the pairing process.
Troubleshooting Common Setup Problems
If you experience setup issues, try the following solutions:
Check that all cables are connected correctly.
Confirm that your TV is set to the correct HDMI input.
Make sure the remote batteries are installed properly.
Restart your device if the setup screen does not respond.
Check your WiFi password if the network connection fails.
Restart your router if network problems continue.
Tips for a Better vSeeBox Setup Experience
For a smoother setup process:
Place your router in an open location.
Keep your vSeeBox connected securely to power.
Use a reliable network connection.
Keep your remote within a suitable distance from the device.
Check all cable connections before starting setup.
Conclusion
Setting up your vSeeBox device is a straightforward process when following the correct steps.
By connecting the hardware, pairing the remote, adjusting display settings, and configuring your network connection, you can quickly prepare your device for daily use.
If you encounter any difficulties during setup, checking each step carefully can help identify and resolve common issues.